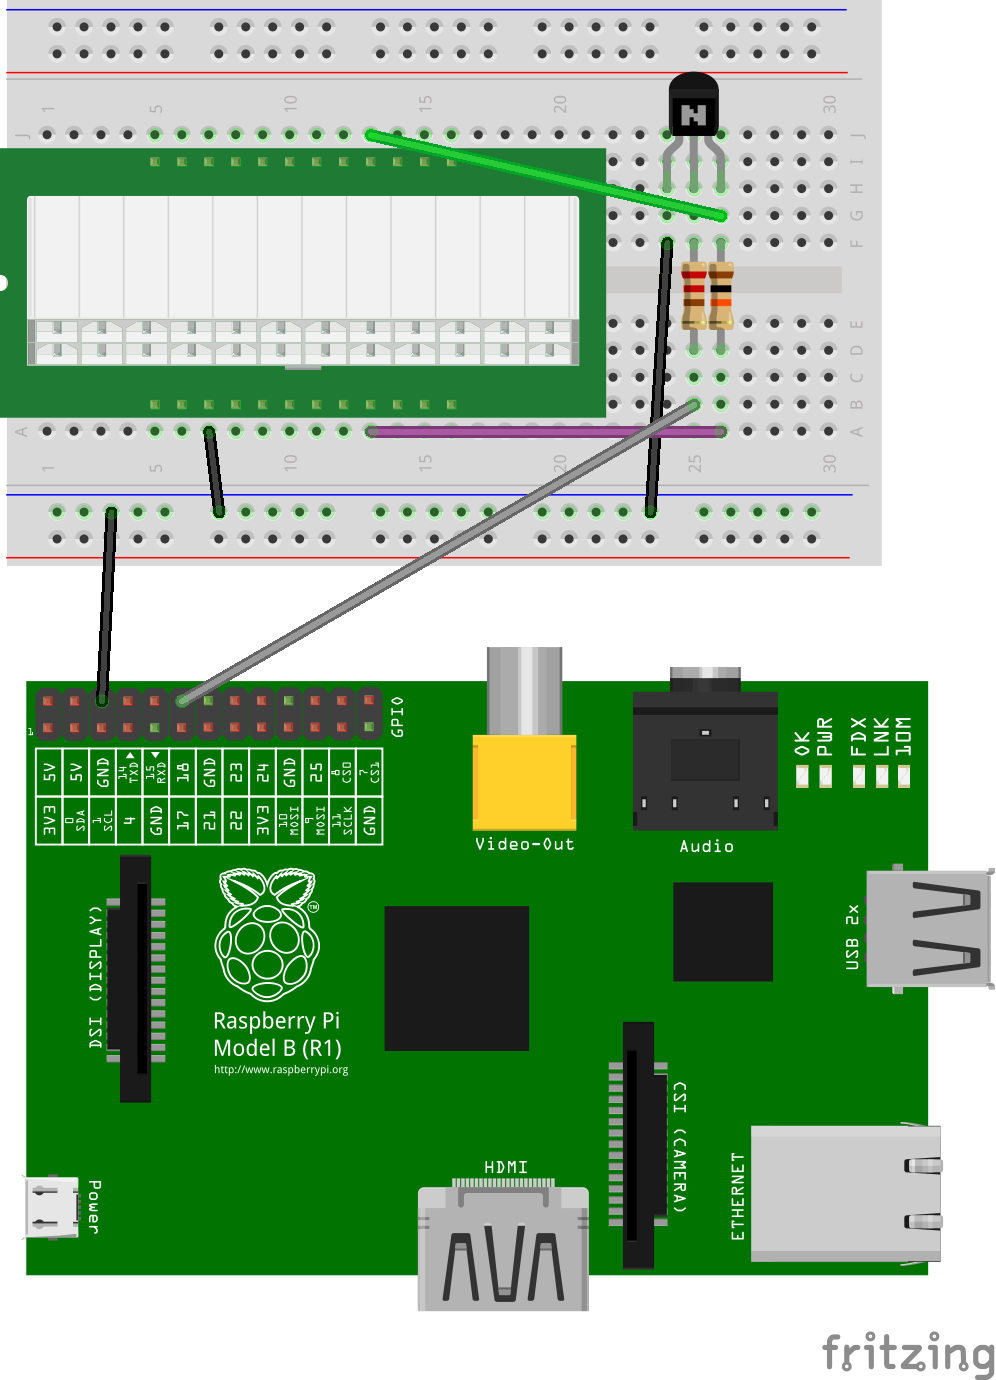
ATX/PSU
Control
ATX wiring and software command
- 3V - Orange
- 5V - Red
- 12V - Yellow
- GND - Black
- POWERON - Green (shunt with ground to activate the PSU)
- STANDBY - Purple (5V even with inactive PSU)
wiring and command
Eventually the RasPi can be powered by the atx standby supply, because that line has permanent 5V and is more than enough to power the RasPi. It was not our choice because we sometimes use motor and other heavy parts on the ATX and we don't want our RasPi vulnerable to power instabilities and noise that may arise from heavy loads


We will use bash shell script and WiringPi GPIO tools to turn the PSU on/off.
We will be using pin BCM GPIO 18 (WiringPi GPIO 5) to control the PSU but you can choose another suitable pin of your choice, by change the pin number on the scripts.
sudo nano /usr/bin/on
#!/bin/bash
gpio mode 5 out
gpio write 5 on
sudo chmod +x /usr/bin/on
sudo nano /usr/bin/off
#!/bin/bash
gpio mode 5 out
gpio write 5 on
sudo chmod +x /usr/bin/off
After this we can control the PSU by writing on or off on the console.
Then we can use the RasPi network to control it virtually from anywhere.
 Raising technology...

